
Traditional Christmas Pan d’oro – The Italian Star Shaped Golden Bread Recipe
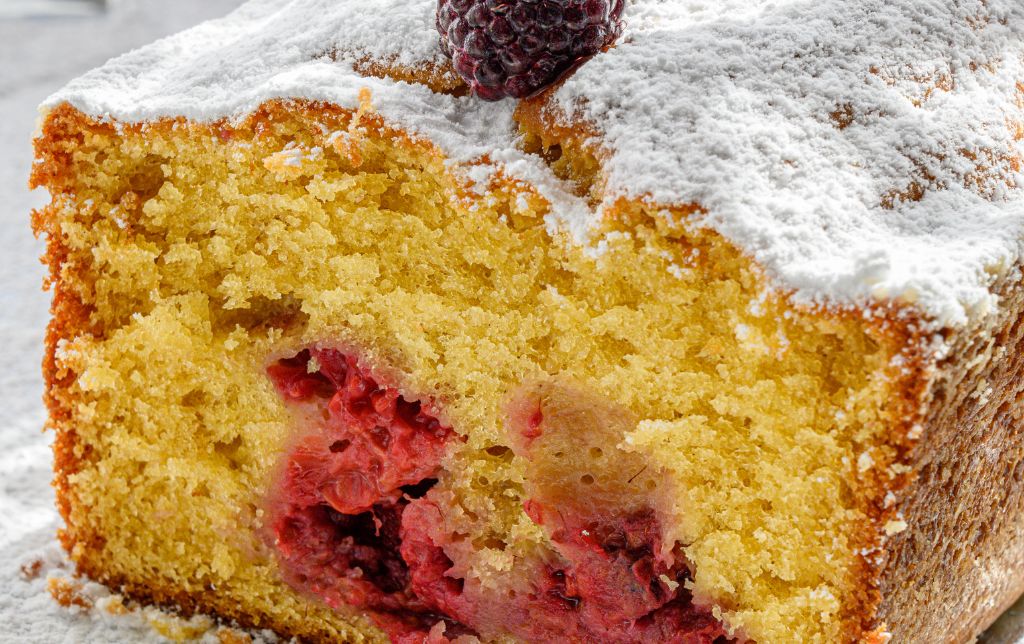
Alongside panettone, pandoro (pan d’oro Italian for golden bread) is another festive cake, shaped like an eight-pointed star. Unlike Panettone, it doesn’t contain dried fruit or citrus peel but it has instead a lighter, much simpler taste and it is dusted with powdered sugar to mimic the look of snow.
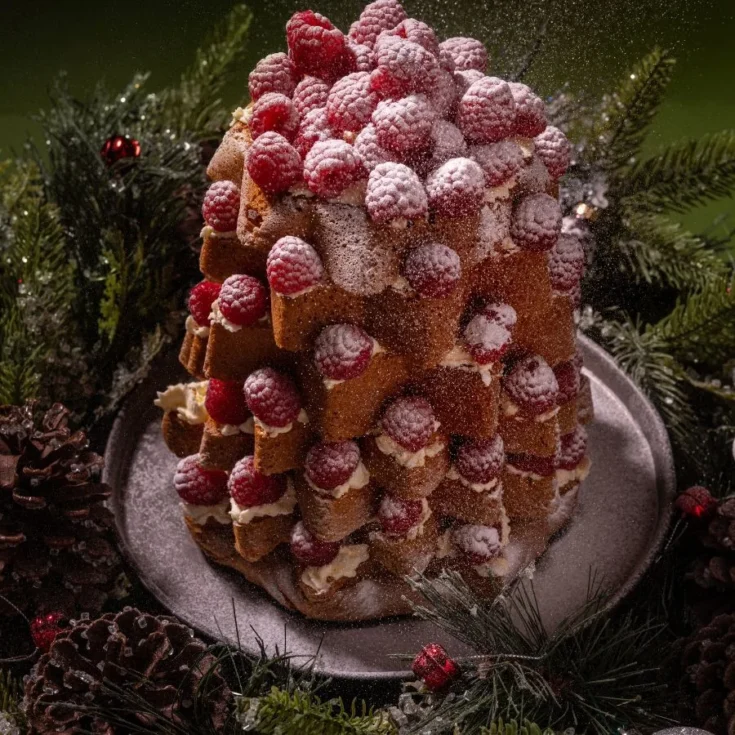
What I love most about this cake is that you can slice it into layers of little star-shaped cakes, and stack them to form a tree. You can then decorate it with creamy ricotta based tinsel or chocolate baubles, or some other edible ornaments like berries and nuts, just like a Christmas tree only this one is delicious and smelling like winter celebrations! It’s a way to elevate the holiday table with a dessert that’s as much about the joy of creation as it is about the taste.

Recipe Card for Traditional Pandoro (Pan D’Oro – Golden Bread)
Pan d'oro
Pandoro is a festive cake, shaped like an eight-pointed star. Unlike Panettone, it doesn't contain dried fruit or citrus peel but is instead dusted with powdered sugar to mimic the look of snow.
Ingredients
For the Dough:
- 500g strong bread flour
- 200g sugar
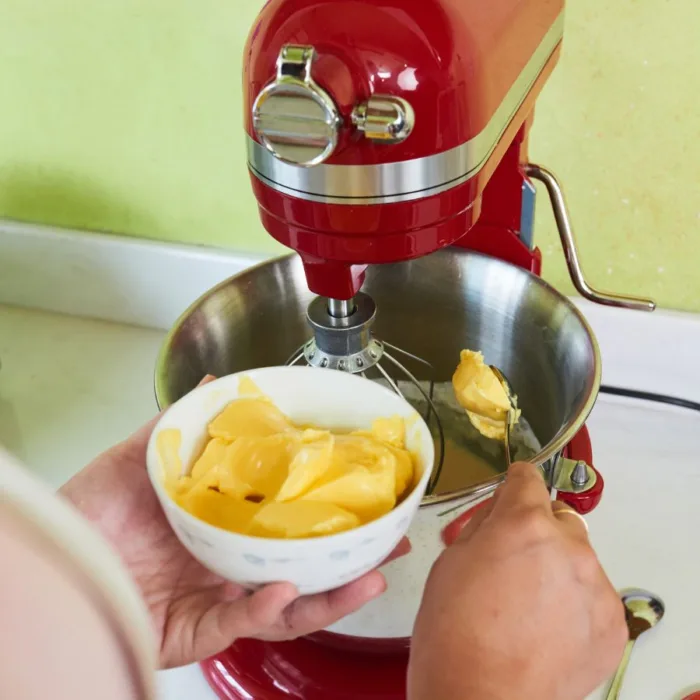
- 200g butter, softened
- 4 large eggs
- 100g milk, lukewarm
- 25g fresh yeast or 12g active dry yeast
- 1 teaspoon vanilla extract
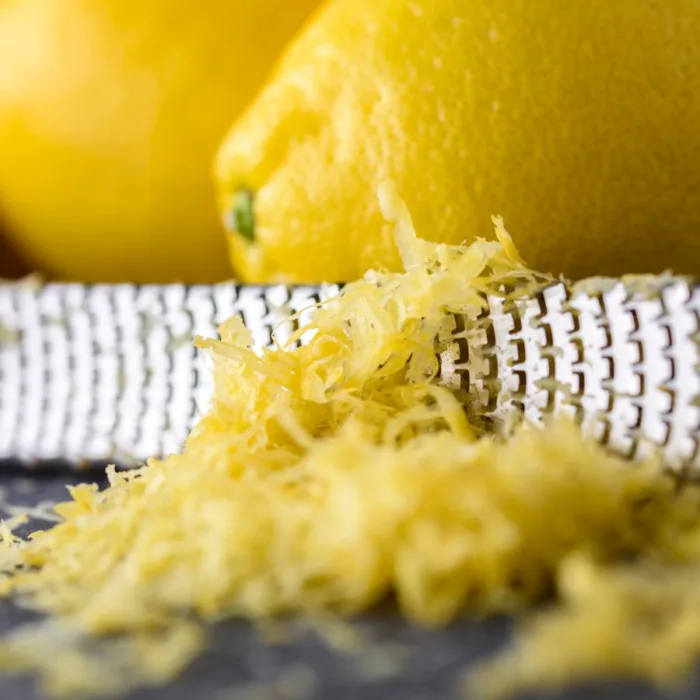
- Zest of 1 lemon
- Zest of 1 orange
- Pinch of salt
For the First Rise:
- 100g butter, softened
- 100g sugar
For the Second Rise:
- 50g butter, softened
- 50g sugar
For Dusting:
- Powdered sugar
Instructions
- Activate the Yeast:
If using fresh yeast, crumble it into the lukewarm milk with a spoonful of sugar and let it sit until frothy (about 10 minutes). If using dry yeast, mix it directly into the flour. - First Dough:
In a large bowl or mixer, combine flour, sugar, salt, lemon zest, and orange zest. Make a well in the center and pour in the yeast mixture (or just the milk if using dry yeast). Mix in the eggs one at a time, then add vanilla extract.
Knead until you have a smooth dough, then add the butter in small chunks, kneading until fully incorporated. The dough should be elastic and not sticky. - First Rise:
Cover the dough and let it rise in a warm place until doubled in size, about 2 hours. - Adding Butter and Sugar:
After the first rise, punch down the dough. Mix in the first batch of butter and sugar for the second dough, kneading until completely smooth. Let it rise again until doubled, about 1 to 1.5 hours. - Shaping the Pandoro:
Grease a star-shaped Pandoro mold with butter. Punch down the dough again, then incorporate the second batch of butter and sugar. Shape the dough into a ball and place it into the mold, seam-side down.
Let it rise in the mold until it reaches the top of the mold or is slightly above, which can take another 2-3 hours, depending on the room temperature. - Baking:
Preheat your oven to 160°C (320°F). Bake for about 45 minutes to an hour, or until a skewer inserted into the middle comes out clean. If the top browns too quickly, cover it with foil. - Cooling:
Allow the Pandoro to cool in the mold for about 10 minutes, then turn it out onto a wire rack to cool completely. - Serving:
Once completely cooled, dust generously with powdered sugar. Then cut it into slices that maintain the star shape and enjoy it!
Notes
- The key to a good Pandoro is patience with the rising times; the more time it takes, the better the texture.
- The quality of butter is crucial as it significantly affects the taste and texture of the cake.
Here are some tips to turn your first time of making pandoro into a success:
1. Quality Ingredients:
- The butter: you should use high-quality, unsalted butter because in this cake you will feel its flavor, so it needs to be rich and taste good.
- The flour: you should opt for a strong, all-purpose flour with good gluten content to get the airy texture.
- Zest: Use fresh lemons and oranges for zest; the freshness adds a vibrant flavor. OR, if you can’t find the fruits, the essential oils of lemon and orange are a nice substitute!
- Make sure the yeast is fresh: It doesn’t make a difference if you use the fresh or the dry yeast but it’s very important to check its expiration date and make sure it did not grow mold (if it’s fresh). To make sure it’s ok, activate it in warm milk with a bit of sugar. It needs to make bubbles in maximum 15 minutes. If nothing happens, go buy another yeast.

2. Pay attention to the entire process:
- Keep your dough at a consistent, warm temperature for rising. Avoid drafts. If your kitchen is cold, consider using a proofing box or an oven with the light on.
- Knead thoroughly but gently, do not over-knead! The dough should be smooth and elastic but not over-kneaded, as this can affect the lightness of the cake. If using a stand mixer, be careful not to overheat the dough.
- Add butter slowly and in small amounts! This helps the butter to be fully absorbed into the dough, giving Pandoro its unique texture.
- The rising is crucial for developing the cake’s light and fluffy structure, so keep your patience! Plan ahead enough time to give this cake your full attention. The first rise should at least double the dough’s volume.
- As it has a lot of nooks and crannies, the pandoro mold needs to be very meticulously buttered. Every milimeter should be covered with abundant grease to prevent sticking. After you buttered it, take the mold outside or put it in the fridge for several minutes to chill. Thus the butter will be set in place, making it easier to remove the cake later.
- Since it is a tall cake, the top might get burnt. So, after the top got the beautiful golden color you expected, cover it loosely with foil so that it will stay like that.
- Test for doneness with a thin skewer gently, not to collapse the structure.
- Allow the cake to cool in the mold for a while but not too long, as the steam can make it soggy. Once out of the mold, cool completely on a wire rack to retain its shape and texture.
- Use a fine mesh sieve to dust with powdered sugar for an even, snow-like coating.
- Do not cut it (unless you want to make it a tree cake), but rather pull the Pandoro apart in order to preserve its light, airy structure. This is because its tall, delicate structure will collapse when pressed with a knife. If you want to horizontally cut it though, in order to make a tree cake, you need to use a cake wire slicer.


What can go wrong? The main pitfalls when making pandoro?
Making pandoro can be quite challenging, and several things can go wrong if not done correctly. Here are common issues you might encounter:
1. Cake doesn’t rise:
- the yeast doesn’t activate properly or is dead, you will have a dense (still tasty) but glutinous cake.
- the batter is under-knead, so the dough won’t develop enough gluten, leading to a cake that doesn’t hold its shape well.
- the temperature in the room is either too cold (slows down the fermentation process) or too hot (above 40 degrees Celsius, it kills the yeast)
- the air in the room is too humid. High humidity can affect dough rising and the final texture of the cake.
2. Pandoro cake collapse during baking
- too much yeast that causes the cake to over-rise and then give in to its own weight
- the batter is overworked. Adding butter too quickly or over-kneading once butter is added can make the dough greasy or collapse the structure.
3. Pandoro cake is too dense or uneven
- batter is over-knead, so it will toughen the dough, making the cake less tender
- butter is not thoroughly mixed. If butter isn’t fully incorporated, the dough can be streaky, leading to uneven texture.
- baking at too high or too low a temperature can result in an uneven bake, with the outside burning while the inside remains uncooked, or vice versa.
- overbaking dries out the cake, while underbaking leaves it doughy in the middle.
- cake cooled in the mold too long. This can make the Pandoro soggy from steam trapped inside.
- cake not cooled enough. If not cooled before unmolding, it can break apart or lose its shape.
4. Pandoro cake breaks when extracted from mold
- the mold isn’t properly greased, especially in all the intricate parts of a star-shaped mold, the cake can stick, breaking apart when removed.
- underbaking makes the texture even more fragile
- cake is roughly handled. Pandoro’s delicate structure can collapse if not handled gently, especially when removing from the mold or slicing.
Can I make a chocolate pandoro?
As with the panettone, if you love chocolate so much so that you can’t wait for the Valentines to come, well yes, you can make the pandoro work very well with chocolate too. Here are the adjustments you will need to make:
1. Flour and Cocoa Powder:
- Reduce the amount of all-purpose flour by 100g (down to 400g total) to make room for the cocoa powder.
- Sift together 400g of flour with 100g of cocoa powder to ensure they are well combined before mixing with wet ingredients.
2. Chocolate Incorporation:
- After activating the yeast and beginning to mix your dough, you can add the sifted cocoa powder-flour mixture.
- If using melted chocolate, allow it to cool slightly before adding it to the dough along with the butter. If using chocolate chips, fold them in after the dough has come together but before the first rise.
3. Kneading:
- The dough will be a bit stiffer due to the cocoa, so you might need to knead it a little longer until it becomes smooth and elastic. Be aware that the cocoa can make the dough seem drier at first.
4. Rising:
- The rising times might be slightly longer due to the added cocoa powder, so keep an eye on the dough, making sure it doubles in size before proceeding.
5. Baking:
- The baking time might need adjustment. Check the cake a bit earlier than with the traditional recipe because the cocoa can cause it to bake quicker. Use a skewer to test for doneness, ensuring it comes out clean or with just a few moist crumbs.
6. Cooling and Dusting:
- Cool as in the traditional recipe.
- For dusting, you can use powdered sugar mixed with a bit of cocoa powder for a chocolatey look, or if you stick to traditional powdered sugar, the contrast will create a very yummy effect
…for your convenience I will also leave the Chocolate Pandoro Recipe Card here:
Chocolate Pandoro Recipe Card
Chocolate Pandoro

Below is a recipe for a Chocolate Pandoro, adapted from the traditional Italian Pandoro to incorporate chocolate elements. Since Pandoro is a yeasted bread requiring time and care, this version adds cocoa to the dough and includes a chocolate filling option for extra indulgence. It’s not a quick bake—think of it as a special project for a festive occasion like Easter or Christmas. I’ll keep it detailed but straightforward, with steps you can follow using standard kitchen tools.
Ingredients
For the Dough:
- 4 cups (500g) all-purpose flour (or strong bread flour for better structure)
- 1/3 cup (30g) unsweetened cocoa powder
- 1/2 cup (100g) granulated sugar
- 2 1/4 tsp (7g) active dry yeast (1 packet)
- 1/2 cup (120ml) whole milk, lukewarm
- 3 large eggs, room temperature
- 1 large egg yolk (save the white for brushing or another use)
- 1/2 cup (115g) unsalted butter, softened, plus extra for greasing
- 1 tsp vanilla extract
- 1/2 tsp salt
- Zest of 1 orange (optional, for a classic Pandoro nod)
For the Chocolate Filling (Optional):
- 3.5 oz (100g) dark chocolate, finely chopped
- 2 tbsp (30g) unsalted butter
- 1 tbsp sugar
- 1/4 cup (60ml) heavy cream
For Finishing:
- Powdered sugar, for dusting (or cocoa powder for a darker look)
- Optional: Melted chocolate for drizzling
Instructions
- Activate the Yeast
In a small bowl, combine lukewarm milk (about 100°F/38°C), 1 tsp of the sugar, and the yeast. Stir and let sit for 5-10 minutes until foamy. - Make the Dough
In the bowl of a stand mixer, sift together flour, cocoa powder, and salt. Add the remaining sugar, foamy yeast mixture, eggs, egg yolk, vanilla, and orange zest (if using).
Mix on low speed with the dough hook for 2-3 minutes until a shaggy dough forms.
Increase to medium speed and knead for 5 minutes. The dough will be sticky—resist adding extra flour yet.
Add softened butter, 1 tbsp at a time, kneading for another 8-10 minutes until the dough is smooth, elastic, and slightly tacky. (By hand, this takes about 15-20 minutes of vigorous kneading.) - First Rise
Shape the dough into a ball and place it in a lightly greased bowl. Cover with plastic wrap and let rise in a warm spot (75-80°F/24-27°C) for 2-3 hours, or until doubled in size. (A turned-off oven with the light on works well.) - Shape and Second Rise
Punch down the dough gently. If using a filling, proceed to step 5 now. Otherwise:
Grease your Pandoro mold generously with butter. Transfer the dough to the mold, pressing it down lightly.
Cover loosely with plastic wrap and let rise again for 6-8 hours (or overnight in a cool spot), until the dough reaches near the top of the mold. - Optional Chocolate Filling
While the dough rises, make the filling: Heat cream, butter, and sugar in a small saucepan over low heat until melted. Remove from heat, stir in chopped chocolate until smooth. Cool slightly. (Use your skimmer ladle to strain if any lumps remain.)
After the first rise, roll out the dough into a rectangle (about 12x16 inches). Spread the chocolate mixture evenly over it, then roll it up tightly like a jelly roll. Place the roll, seam-side down, into the greased mold, coiling it slightly to fit. Proceed to the second rise. - Bake
Preheat oven to 350°F (175°C).
Bake the Pandoro for 45-50 minutes, until a skewer inserted comes out clean (internal temp should be 190°F/88°C). If the top browns too fast, tent with foil after 30 minutes.
Let cool in the mold for 10 minutes, then turn out onto a wire rack to cool completely. - Finish
Dust generously with powdered sugar or a mix of powdered sugar and cocoa. For extra decadence, drizzle with melted chocolate.
Slice into wedges or pull apart—Pandoro’s fluffy layers make it perfect for sharing.
Additional tips to make your chocolate panettone a hit:
- Chocolate Type: Dark chocolate will give a less sweet, more intense flavor, while milk chocolate will sweeten the bread significantly. Consider the taste you’re aiming for.
- Zest: The orange and lemon zest can still be used as they complement chocolate well, enhancing its flavor. However, you might want to slightly increase the vanilla extract to 1 teaspoon in the third dough for more aromatic depth.
- Baking Time: Keep an eye on your panettone while baking as the added chocolate can impact the baking time. It might take a bit longer due to the extra moisture from the chocolate. Check for doneness with a skewer; it should come out clean or with just a few crumbs (not wet dough).
- Cooling: After baking, hang your panettone upside down in its mold or using skewers to prevent it from collapsing.
- Proofing: With the addition of cocoa, which can slow yeast activity, ensure your dough proofs in a warm environment to promote rising.
These modifications should give you a delightful chocolate panettone that will go perfectly with a cozy cup of tea. Remember, baking is part science, part art, so you might need to adjust quantities slightly based on the specific ingredients you use and your kitchen’s conditions.
Serving the Pandoro: how to cut it and make it a tree like structure?


What You’ll Need:
- A sharp serrated knife or a cake leveler with a wire
- Filling of your choice (e.g., whipped cream, pastry cream, mascarpone, or chocolate spread)
- Decorations (optional): berries, nuts, chocolate chips, or confectioner’s sugar for dusting
Steps:
- Prepare Your Workspace: lay down a clean cutting board or work surface where you’ll assemble your tree.
- Slice Horizontally: place the Pandoro on its side. Using a serrated knife or a cake leveler, carefully slice the cake horizontally into thick slices, about 1 to 1.5 inches (2.5 to 3.8 cm) thick. You’ll want 4 to 6 slices, depending on the height of your Pandoro and how tall you want your tree to be.
- Create the Base: take the largest slice (the bottom one) and place it on your serving platter or cake stand with the cut side facing up. This will be the base of your tree.
- Layer and Offset: spread a layer of your chosen filling over the base slice. Place the next largest slice on top, but slightly rotate it so that the points of the star do not align directly with the points below. This offsetting creates the tree-like appearance. Continue this process with each subsequent slice, spreading filling on each layer and rotating the slices so the star points stagger.
- Decorate the Tips: once your tree is assembled, you can decorate the tips of each layer. Pipe or spoon small amounts of filling onto the tips of each star point to look like snow or tree decorations. Here you can add:
- Berries (like cranberries or raspberries) for a natural look.
- Nuts or chocolate chips for texture.
- Dust with confectioner’s sugar for a snowy effect.
- Final Touches: if you want, you can add additional decorations like mint leaves around the cake for greenery or use a star-shaped cookie or candy for the top of your tree.
Tips to make a tree-like structure of your Pandoro
- Stability: if your tree feels unstable, you can insert a wooden skewer or dowel down the center to help hold everything together, much like with multi-tiered cakes.
- Filling Choice: whipped cream or mascarpone might give you a bit more stability compared to very liquid fillings, but feel free to experiment.
- Cutting: a serrated knife will give you a cleaner cut through the soft, fluffy texture of Pandoro. A cake leveler with wire ensures even slices but requires a gentler touch to avoid squishing the cake.
Frequently asked questions for the first time cooks of Pandoro:
How do I get that traditional snowy look with powdered sugar?

Use a fine mesh sieve to dust the sugar over the cake. A light hand is key, ensuring an even distribution without clumping.
What kind of flour should I use for Pandoro?
As with the panettone, the traditional choice for Pandoro is Italian “00” flour as well. It’s a very finely milled flour with a low protein content, which contributes to the cake’s light, tender, and airy texture. Look for “00” flour that is specifically for pastry or bread making, ensuring it has the right characteristics for leavening and structure.
Key points when choosing the flour:
- Protein Content: The low protein content of “00” flour (around 8-12%) is crucial for the delicate, almost brioche-like texture of Pandoro. High protein content can lead to a denser cake, which is not desirable for this recipe.
- Hydration: Since “00” flour absorbs less liquid, it helps in creating a dough that can rise significantly without becoming too heavy.
Alternative: If “00” flour is not available, you might use:
- All-Purpose Flour: It’s a decent substitute, though it might not yield the same level of lightness due to its slightly higher protein content. You might want to blend it with a small amount of cake flour to approximate the characteristics of “00” flour.
- Cake Flour: Lower in protein than all-purpose flour, it can mimic “00” flour more closely, but it might still require some blending with all-purpose flour to get the gluten strength right for Pandoro.
Do I need special equipment to make Panettone?
A stand mixer is helpful for kneading but not strictly necessary. Also, ideally, you’ll need a Pandoro mold, which is star-shaped. If you can’t get one, you can use different sizes of star flat shapes and put them one on top of the other at the end. Pay attention to the baking time which will decrease significantly if you use these!
How long does it take to make Panettone?
The entire process can take 6 to 8 hours due to the several rising phaes. So you need to plan ahead and free your agenda. Though, from experience, the Christmas cookies are best made in family, while listening carols and laughing together!
Can I use instant yeast instead of active dry yeast to make panettone?
Yes, you can use instant yeast. Typically, you use about 25% less instant yeast than active dry yeast since it’s more potent. Adjust accordingly but remember, proofing times might differ.
How do I know when my Pandoro is done proofing?
Look for the dough to have doubled in size or when it reaches just above the mold’s rim. It should feel somewhere between a batter and a dough when you touch it.
How do I fix a dough that’s too sticky or too dry?
If it’s too sticky, add a little more flour gradually. If it’s too dry, add milk or an extra egg yolk, but do so incrementally to avoid going too far in the other direction.
Can I make Pandoro ahead of time?
You can bake it a couple of days in advance. For longer, freeze it, but beware that it might get a little moist when you thaw it, so you need to take it out at least one day before serving. Thaw at room temperature and dust with sugar before serving.


Very nice dessert! Can you guess what I’m baking right now?